How to make a website for Free in 4 simple steps
Having an online presence is a must to grow your business. Personal Website is the best way to make your mark online.

In recent times it is inevitable to have your website. Whether you have a small business or a large company it is a must. Times have changed. Things are getting simpler with time. Now you can make a website easily as well. So all those small business owners, freelancers, artists or anyone who have been putting off the decision to set up a website this is for you. Get started NOW.
So let’s get started: here’s how to create a WordPress website in 4 quick steps.
1) Domain Name: First thing that you need is obviously a name. A domain name is your URL that is what people type their browser to get to your website. People are often tempted to pick a flashy name but I suggest keep it simple and clean. Choose a name that best represents you or your company. So you have to register a domain name for which I suggest using Bluehost. There are many advantages of using Bluehost is that you can purchase your domain name and hosting service from the same provider. The prices are really affordable as well.
So head over to Bluehost and get your domain name. Now you can get any extension like .com, .org, .net, etc but I advise that you go with .com only. You can quickly check if your domain name is available by typing your domain name below. Check NOW
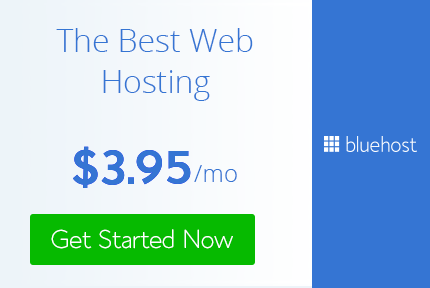
2) Hosting: Now that you have your name you have to get a hosting so you can host your site for the world to see it. Again I recommend Bluehost . It is affordable and reliable. You can get Complete hosting solutions starting at $3.95/month. Choose an option that fits your budget and service needs. Prices vary across hosting providers, but most offer add-ons, like extra security features, tools to boost search rankings, and site backup. Follow the on-screen instructions to create a password and, boom, you are ready for step three: choosing your WordPress theme.
So head over to Bluehost and get your hosting.

3) Choosing your WordPress theme: If you’ve chosen Bluehost as your web host, WordPress will be automatically installed for you. All you have to do is click, ‘Login’ and choose a theme. if you aren’t sure which theme you want, don’t worry! You can go back and change it later. If you don’t like the generic themes, you can upgrade to one of the premium themes.
If however, you have selected some other hosting provider then first you will have to install Wordpress and then follow the above.
Install a theme of your choice according to the nature of your business or website.
4) Website pages: Now that you have selected your theme go to the dashboard and start adding pages and content.
On the left-hand sidebar, you’ll find navigation links that allow you to customize your site. The best way to get to know your way around is to click on each tab and explore the options.
Lets me give some basics here I will be making an in-depth tutorial on how to make a Wordpress website from start to finish. So on the left side you have:
Dashboard: This is the main start of screen. here you will get notifications of plugin updates, etc.
Post: Here you can add in a post to show up on your site.
Media: For adding and uploading media files such as images and videos.
Pages: For Adding new pages to your site.
Comments: For Moderating comments – Here you can approve, delete and reply to the comments.
Appearance: Here you can add in new themes and customization.
Settings: Here you will have setting for your site that will affect your backend and front end. There are many so please go through each one of them.
If you have a hard time getting along follow this post Learning WordPress: 9 Dashboard Features You Need to Know.
Customize your theme according to your colors and content. Your site now ready for the world to explore and bring in more sales.
For further help you can follow these pages:
How to Create Your First Web Page on WordPress (Ashley Cummings)
By Now I think you must be having your site up and running. If you have any problem, issues or doubts feel free to contact me via my blog or comment below and I will answer all your questions.
If you like my tutorials and posts follow me on Twitter and Pinterest or Instagram
In recent times it is inevitable to have your website. Whether you have a small business or a large company it is a must. Times have changed. Things are getting simpler with time. Now you can make a website easily as well. So all those small business owners, freelancers, artists or anyone who have been putting off the decision to set up a website this is for you. Get started NOW.
So let’s get started: here’s how to create a WordPress website in 4 quick steps.
1) Domain Name: First thing that you need is obviously a name. A domain name is your URL that is what people type their browser to get to your website. People are often tempted to pick a flashy name but I suggest keep it simple and clean. Choose a name that best represents you or your company. So you have to register a domain name for which I suggest using Bluehost. There are many advantages of using Bluehost is that you can purchase your domain name and hosting service from the same provider. The prices are really affordable as well.
So head over to Bluehost and get your domain name. Now you can get any extension like .com, .org, .net, etc but I advise that you go with .com only. You can quickly check if your domain name is available by typing your domain name below. Check NOW
2) Hosting: Now that you have your name you have to get a hosting so you can host your site for the world to see it. Again I recommend Bluehost . It is affordable and reliable. You can get Complete hosting solutions starting at $3.95/month. Choose an option that fits your budget and service needs. Prices vary across hosting providers, but most offer add-ons, like extra security features, tools to boost search rankings, and site backup. Follow the on-screen instructions to create a password and, boom, you are ready for step three: choosing your WordPress theme.
So head over to Bluehost and get your hosting.
3) Choosing your WordPress theme: If you’ve chosen Bluehost as your web host, WordPress will be automatically installed for you. All you have to do is click, ‘Login’ and choose a theme. if you aren’t sure which theme you want, don’t worry! You can go back and change it later. If you don’t like the generic themes, you can upgrade to one of the premium themes.
If however, you have selected some other hosting provider then first you will have to install Wordpress and then follow the above.
Install a theme of your choice according to the nature of your business or website.
4) Website pages: Now that you have selected your theme go to the dashboard and start adding pages and content.
On the left-hand sidebar, you’ll find navigation links that allow you to customize your site. The best way to get to know your way around is to click on each tab and explore the options.
Lets me give some basics here I will be making an in-depth tutorial on how to make a Wordpress website from start to finish. So on the left side you have:
Dashboard: This is the main start of screen. here you will get notifications of plugin updates, etc.
Post: Here you can add in a post to show up on your site.
Media: For adding and uploading media files such as images and videos.
Pages: For Adding new pages to your site.
Comments: For Moderating comments – Here you can approve, delete and reply to the comments.
Appearance: Here you can add in new themes and customization.
Settings: Here you will have setting for your site that will affect your backend and front end. There are many so please go through each one of them.
If you have a hard time getting along follow this post Learning WordPress: 9 Dashboard Features You Need to Know.
Customize your theme according to your colors and content. Your site now ready for the world to explore and bring in more sales.
For further help you can follow these pages:
How to Create Your First Web Page on WordPress (Ashley Cummings)
By Now I think you must be having your site up and running. If you have any problem, issues or doubts feel free to contact me via my blog or comment below and I will answer all your questions.
Affiliate Disclaimer: This post contains affiliate
links and I will be compensated if you make a purchase after clicking on my
links. This will not cost you a single penny extra. Thanks for the
understanding and rewarding me for my hard work.
If you like my tutorials and posts follow me on Twitter and Pinterest or Instagram